
However I am still going to go ahead and play the scenarios in order, no matter how long it takes. So when I was looking for a suitable setup to try out the tank side of the WWII rules from 'Wargaming: An Introduction', I decided that the next scenario in the list - Counter Attack - was as good as any.
In this scenario one force is attacking from a town towards a bridge which is held by one unit of the other side. Early into the game the defenders get the rest of their army, who are able to cross the river using a couple of hidden fords on the flanks, aiming to take the town. Victory goes to the side which holds both the bridge and the town.
I have outlined the way I planned to run things in this post, so I won't repeat my changes to the rules and the reasoning behind them here. I still wasn't sure how to play the relationship between damaged and immobilised tanks, and assumed Id make it up as I went along.
I set the scenario in 1944, with British and Germans as the opponents. The British were defending the bridge, the Germans the town. I used the tanks from Memoir '44, supplemented by some 3D prints.
I decided to treat one 'unit' in the scenario as two medium tanks or artillery barrages, one heavy tank or three light tanks. I didn't roll for forces.
The Germans had: 1 x Tiger 1, 2 x Stug III, 6 x Panzer IV, 2 x Artillery Barrage
The British had: 2 x Sherman Fireflies, 6 x Shermans, 3 x Stuarts, 2 x Artillery Barrage
In the WWII rules artillery can only fire at something visible to a stationary infantry unit. Since I didn't have any infantry units in play, I fudged things. Each Barrage picked a target, and rolled dice. On a 4-6 the target could be engaged, otherwise the Barrage didn't fire that turn. In addition the rules don't allow tanks to be engaged by artillery anyway. I changed this. The Barrage rolls to hit as normal, and the tank gets a save of 2-6. Any failed save is treated as a Damaged result. This makes it possible to slow tanks down and, if you are very lucky, immobilise or destroy them.
I had considered adding more terrain to the scenario in order to block lines of fire, but decided to run the scenario as it was just to see what happened. I reasoned that the 'to hit' rolls to some extent represented the presence and use of a certain degree of cover.
So the fight begins. The Germans advanced a strong force in the centre towards the bridge. Out of shot in the picture, the two Stugs covered the right flank, and two Panzer IVs the left. They were to head towards the fords on each flank; they couldn't cross them, but their task was to stop the British doing so.

The defenders of the bridge - a Sherman and a Firefly.

The Sherman was damaged by artillery, but was quickly back in action.

Disaster for the Germans! The Firefly's first shot knocked out the Tiger.

However the accompanying Panzer IVs took out the Firefly.

A Panzer IV was disabled by artillery fire and a shot from the Sherman.

At this point the British counter-attack began, with three Shermans and a Firefly attacking the ford on the German right.

Meanwhile two Shermans came down the road to bolster the bridge defences. The three Stuarts would be held in reserve, ready to strike across an undefended portion of the river and rush the town with their greater speed.

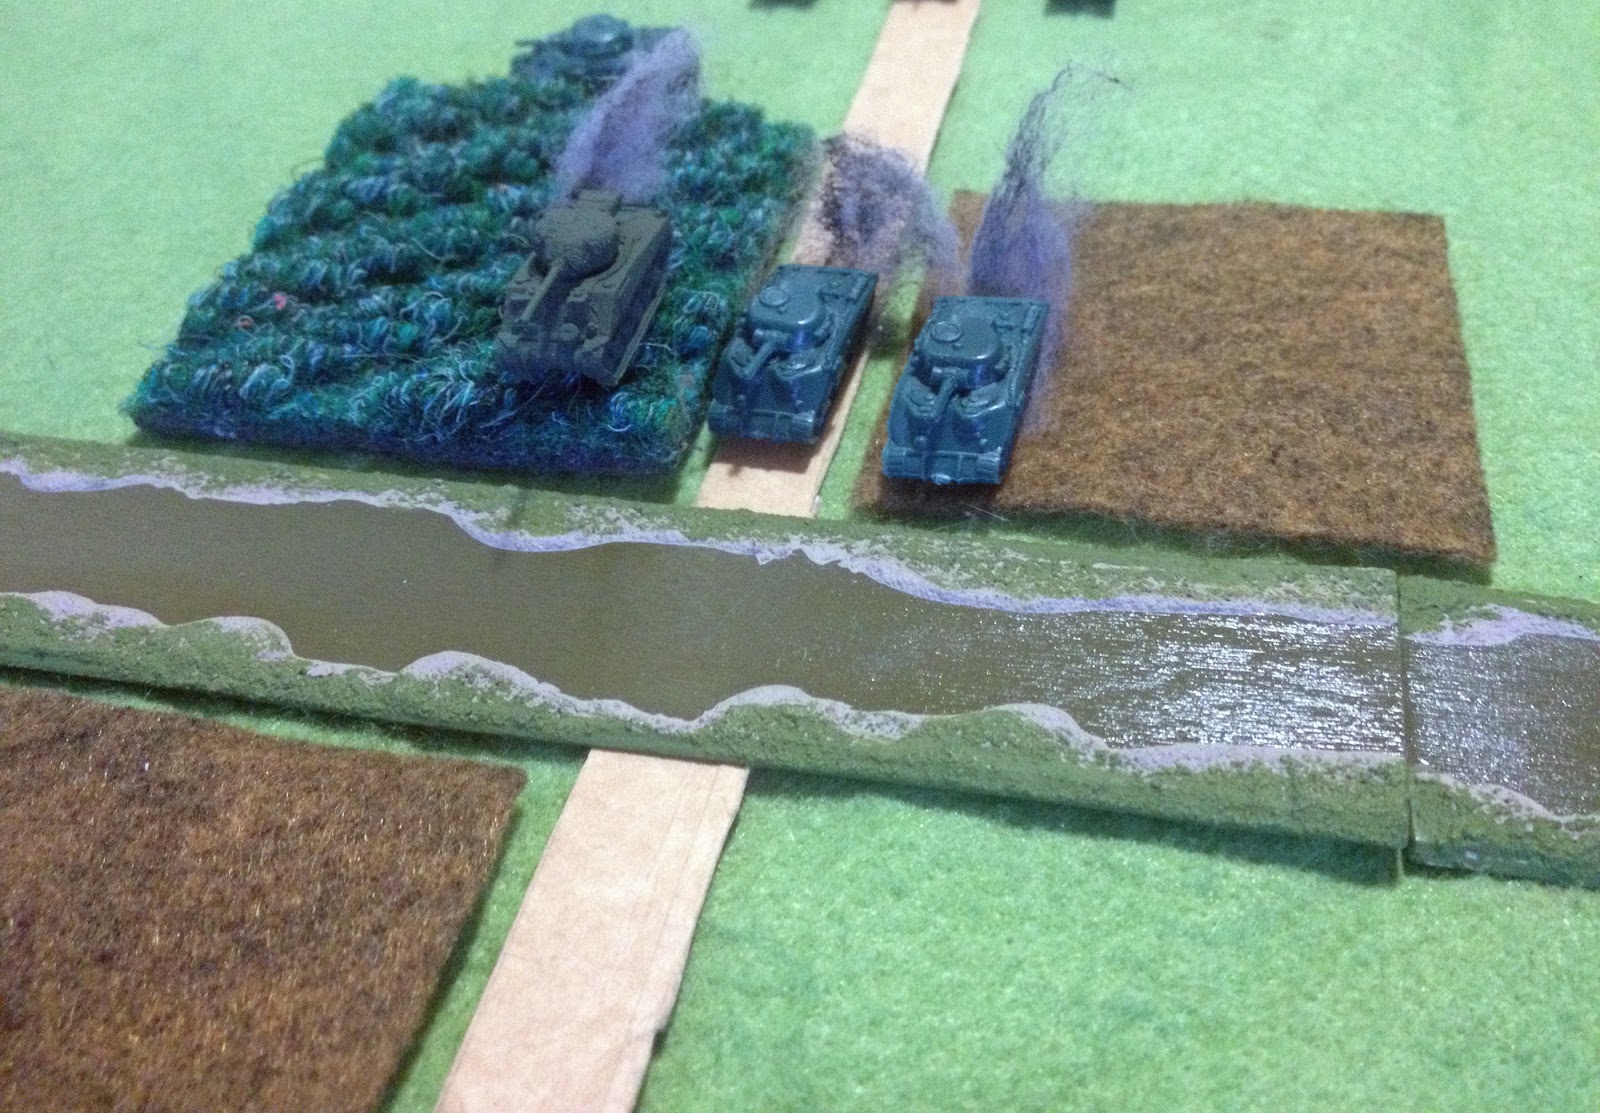
An overview of the position three turns into the game. The British attacking the ford were advancing half of their tanks each turn whist the others provided covering fire. In the centre the British were pushing forward as fast as they could in order to reinforce the bridge. The German Stugs were in a good position at the ford.

The Panzer IVs tasked with covering the ford on the German left fell foul of the British artillery. One was destroyed and the other damaged.

British attempts to reinforce the bridge ended in failure, as the Panzer IVs on the other side picked the Shermans off one after the other.
Meanwhile the Stuarts moved to cover the attack on the other ford.

This wasn't going well; the Stugs had destroyed one Sherman and immobilised another.

The Germans advanced across the bridge. You'l note that there's no bridge there. I have one suitable model, but I couldn't find it. A ford would suffice. We'l call it a bridge.

The British finally took out the two Stugs. But only the Firefly and a couple of Stuarts were now operational on their side of the river. One Stuart and one Sherman were immobilised. Taking the town was going to be a difficult proposition.

On the German left one Panzer IV pulled back to cover the town - just in case.

Another crossed the bridge (it's a bridge, not a ford) and took cover amongst the wrecked Shermans on the other side in order to engage the Stuarts.

The Firefly edged cautiously towards the ford.

The Panzer IV reached the town and took up a position on the road.

I missed some photos here. A combination of artillery and some lucky shooting by the Stuarts knocked out the Panzer IV on the British side of the river. A lone Stuart crossed the bridge, putting it back under British control.

Meanwhile the Firefly moved towards the town. The problem was that in order to fire it had to move too slowly to reach the town before time ran out on the game.

However this was academic; the Panzer IV destroyed it.

With one turn left it was obvious the battle was a draw. The Germans had one operational Panzer IV left, but still held the town. The British held the bridge, but never came close to threatening the town. They had one operational Stuart, plus one immobilised Stuart and an immobilised Sherman. As counter-attacks go, it wasn't much of one, with the British barely making it across the river. The Stugs can be the unsung heroes of that aspect of the game; they held the crossing successfully for several turns, although to be fair some abysmal British shooting helped them a lot.
I think I have the rules for damaged tanks sorted now, and will write them up properly another day. I played artillery incorrectly though, giving it too many firing dice, which made it tremendously effective. However it was equally effective for both sides, so things balanced out.
The game was good fun, with a wonderful retro feel about it. I'd like to try the rules with the full range of troops available, although I'd be looking to modify the infantry side of things such that I can run the units as bases rather than individual figures.
The stats for the tanks were as follows (Armour is Front/Side/Rear):
Sherman - Armour 4/2/1, Gun 4, Medium Speed
Sherman Firefly - Armour 4/2/1, Gun 6, Medium Speed
Stuart - Armour 3/1/1, Gun 2, Fast Speed
Panzer IV - Armour 5/2/1, Gun 5, Medium Speed
Stug III - Armour 5/2/1, Gun 5, Medium Speed, Cannot move and fire (may pivot)
Tiger I - Armour 6/5/2, Gun 6, Slow Speed
Follow the rest of the scenario refights HERE
No comments:
Post a Comment